After your Sonoff RF Bridge – as in the article Sonoff 433Mhz RF Bridge with Tasmota Firmware flashing described – you have flashed the Tasmota firmware, it is now time to configure the firmware correctly. This is described in the following article.
Safety instructions
I know the following notes are always kind of annoying and seem unnecessary. Unfortunately, many people who knew "better" have lost eyes, fingers or other things due to carelessness or injured themselves. Data loss is almost negligible in comparison, but even these can be really annoying. Therefore, please take five minutes to read the safety instructions. Because even the coolest project is not worth injury or other trouble.
https://www.nerdiy.de/sicherheitshinweise/
Affiliate links/advertising links
The links to online shops listed here are so-called affiliate links. If you click on such an affiliate link and make a purchase via this link, Nerdiy.de will receive a commission from the relevant online shop or provider. The price does not change for you. If you make your purchases via these links, you support Nerdiy.de in being able to offer other useful projects in the future. 🙂
Requirements
Helpful articles:
Before you start configuring the Sonoff RF Bridge flashed to the Tasmota firmware, you should have already read the following articles.
Sonoff 433Mhz RF Bridge with Tasmota Firmware flashing
Required material:
In the following list you will find all the parts you need to implement this article.
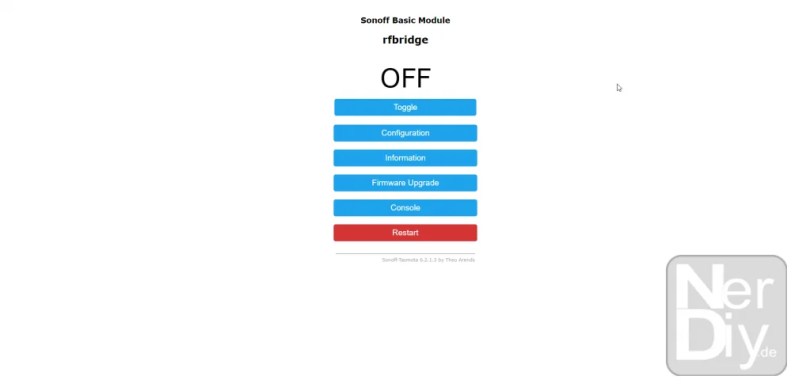
Open the Sonoff 433Mhz RF Bridge configuration webpage
In order for you to be able to configure your Sonoff RF Bridge, you must first open the configuration interface.
You can reach this with your web browser under the IP address of your Sonoff RF Bridge.
How you can find out the IP addresses of your devices in the network is described in the following article:
Display/find out the IP address of the devices in the network
Configure Sonoff 433Mhz RF Bridge
After flashing the Sonoff 433Mhz RF Bridge with the Tasmota firmware, it must first be configured as an RF bridge.


Learn radio socket/remote control
In order to be able to control a radio socket via the Sonoff RF Bridge, you should already be able to control the radio socket using the radio remote control that is often included.
You can then use the Sonoff RF Bridge to simply "listen" to the signal from the radio remote control. The intercepted radio remote control signal can then be used later to control the desired socket with the Sonoff RF Bridge.
The Sonoff RF Bridge must first be switched to "learning mode" so that you can "listen" to the signals from the radio remote control.


For example, if you want to switch on a socket using radio button no. 1, you must first switch it to learning mode. This can be done with the command:
Rfkey1 2
The "1" stands for radio button 1 and the "2" indicates that it is to be switched to learning mode.
For example, if you want to switch radio button number 5 to learning mode, the command would be:
RFkey5 2
are.


Your Sonoff RF Bridge is now "armed" and is waiting in learning mode for it to receive a valid radio signal. Now you should press the button on the radio remote control which switches on the socket that you now want to teach to the Sonoff RF Bridge.
Have you pressed the button (sometimes you have to hold it down for a while until the RF Bridge recognizes the signal). Your Sonoff RF Bridge will beep twice, confirming (and a message in the console window) that the radio signal has been detected and saved.

If you now press the radio button you just learned on the main page of the configuration interface, your radio socket should switch on.
To switch off the radio socket, you now have to teach another radio button with the switch-off signal.
The same applies to other sockets that you want to control in this way.
As you might. As you have noticed, a maximum of 8 sockets can be switched on or off with the 16 radio buttons.
Another/easier way to learn the radio sockets is in the article NodeRed – Integrate Sonoff 433Mhz RF Bridge described.
More information
https://github.com/arendst/Sonoff-Tasmota/wiki/Commands#sonoff-rf-bridge-433
https://github.com/arendst/Sonoff-Tasmota/issues/1181
Have fun with the project
I hope everything worked as described for you. If not or you have questions or suggestions please let me know in the comments. I will then add this to the article if necessary.
Ideas for new projects are always welcome. 🙂
PS Many of these projects - especially the hardware projects - cost a lot of time and money. Of course I do this because I enjoy it, but if you think it's cool that I share the information with you, I would be happy about a small donation to the coffee fund. 🙂


Great explanation!
up until then everything worked fine for me.
I would now like to control 4 radio sockets via Alexa.
Could you also give instructions on this?
I think there must now also be settings or codes/rules so that the connection to alexa works.
Hi Jürgen,
I'm pleased. 🙂
I have described an example of how to control sockets with the Sonoff 433Mhz Bridge here: https://nerdiy.de/nodered-sonoff-433mhz-rf-bridge-einbinden/
I have not (yet) created any instructions for controlling with Alexa. 🙂
Best regards
Fabian
I also applaud you for your explanation! Flashing worked well even with the R2 V2.2 version. I can also access the Tasmota interface and see the recognized commands. But unfortunately the learning doesn't work for me. The bridge beeps once and after a while failed comes up. Do you have any idea why that is?
Greetings
Fabian
Hi Fabian,
so ad hoc I don't know, sorry. Perhaps the socket/remote control uses a radio protocol that is not supported by the RF bridge? :/
Best regards
Fabian
Hi Fabian,
I have the same problem with a 433MHz remote control for my radiant heater.
https://www.etherma.com/de/produkte/9100597
Were you able to fix your problem?