

Whenever possible, I try to use ready-made nuts or threaded inserts when using screws and the like. But sometimes there's just no other way and you have to cut a thread into a material yourself 🙂
It sounds a bit complicated at first, but it really isn't difficult. Here is a small series of pictures of how you can proceed when cutting a thread.
Requirements
Required tool:
In the following list you will find all the tools you need to implement this article.
Safety instructions
I know the following notes are always kind of annoying and seem unnecessary. Unfortunately, many people who knew "better" have lost eyes, fingers or other things due to carelessness or injured themselves. Data loss is almost negligible in comparison, but even these can be really annoying. Therefore, please take five minutes to read the safety instructions. Because even the coolest project is not worth injury or other trouble.
https://www.nerdiy.de/sicherheitshinweise/
Affiliate links/advertising links
The links to online shops listed here are so-called affiliate links. If you click on such an affiliate link and make a purchase via this link, Nerdiy.de will receive a commission from the relevant online shop or provider. The price does not change for you. If you make your purchases via these links, you support Nerdiy.de in being able to offer other useful projects in the future. 🙂
Assembling the tap

There are different types of taps.
However, the "traditional" thread cutting set consists of the four parts shown.
Next to the grab rail on the left-hand side...

...the three taps are the most important parts.
These consist of:
- Pre-cuttermarked with a circumferential ring
- Center cuttermarked with two circumferential rings
- Finish cutter: without ring

The individual taps can be inserted into the holder as shown and clamped firmly.

The inserted tap should be firmly clamped in the holder.
Attaching the tap
You should be particularly careful during the first few turns of the new thread. This is important to ensure that the thread is straight and tidy 🙂

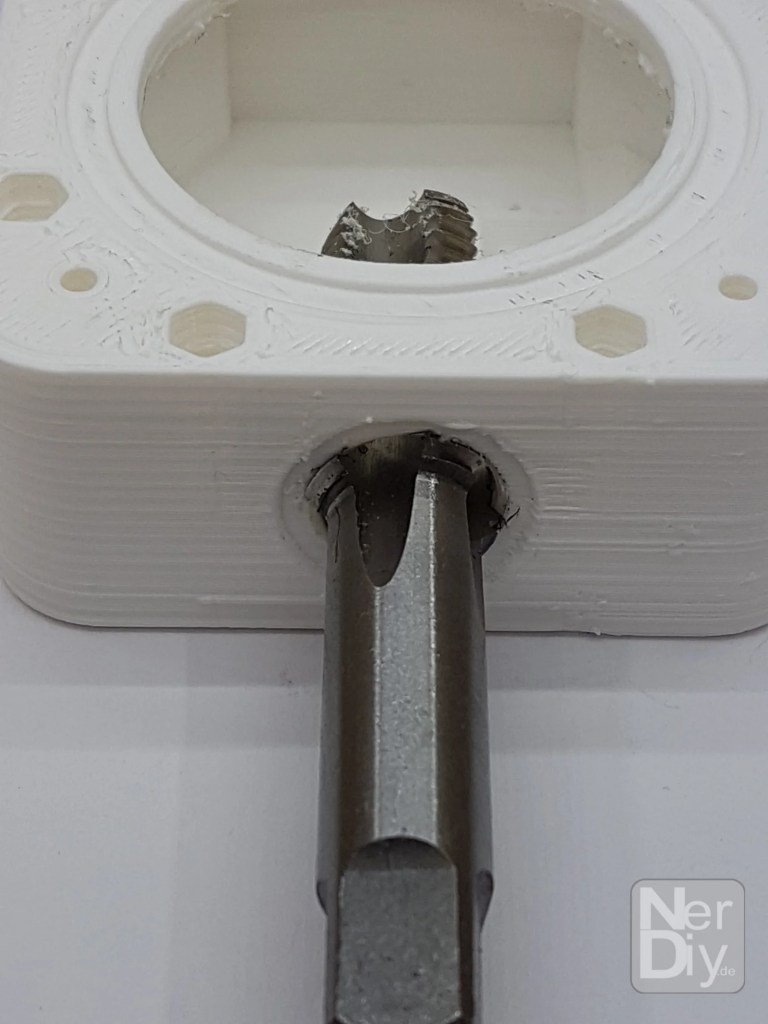
Here you can see the housing used in the article ESPEasy - Level sensor with VL53L0X/VL53L1X is used. A cable clamp must be screwed into this. Of course, there must be a thread in the housing for this. The perfect reason to test our thread cutter 🙂

To do this, set the Pre-cutter - i.e. the tap with a ring - as straight as possible. It should be from above and...

...stand as vertically as possible "on the hole" when viewed from the side.
You have to be careful, especially during the first few turns, because you need a little more force until the tap has "gripped" the housing.
As soon as you have the first threads in the material, you can continue turning carefully.

However, the following is important:
A chip is created during the cutting process, as material is being cut out of the housing. To prevent this from becoming too large and possibly blocking your tap, you should break it off.
This is relatively easy to do by using the Turn the tap back half a turn after every full turn.

This is a bit tedious, but you avoid damaging the tap or the thread itself. 🙂
If you have kept this up, after a while you should have cut the entire thread with the pre-cutter.
You have now reached the end of the first tap.
You should now repeat the whole process with the Center cutter and at the end with the Finish cutter repeat.
Each tap cuts the threads slightly deeper and more precisely. You should only be able to screw in a corresponding screw once the finish tap can be turned easily through the finished thread.
Test thread
Now that you have finished cutting the thread, it is of course time to test the cut thread 🙂

An appropriate screw is best suited for this. In the case of the housing for the level sensor, this is the corresponding cable clamp.

This should be able to be screwed into the thread without much effort. If you need a lot of force, maybe you have forgotten to cut the thread completely with the finish cutter?
If the correctly cut thread still does not fit, you may have used a tap with the wrong pitch.

View of the screwed-in cable clamp from the inside.
Have fun with the project
I hope everything worked as described for you. If not or you have questions or suggestions please let me know in the comments. I will then add this to the article if necessary.
Ideas for new projects are always welcome. 🙂
PS Many of these projects - especially the hardware projects - cost a lot of time and money. Of course I do this because I enjoy it, but if you think it's cool that I share the information with you, I would be happy about a small donation to the coffee fund. 🙂
![]()
![]()